This page is applicable to NetConnect X 1.5 and above
Overview
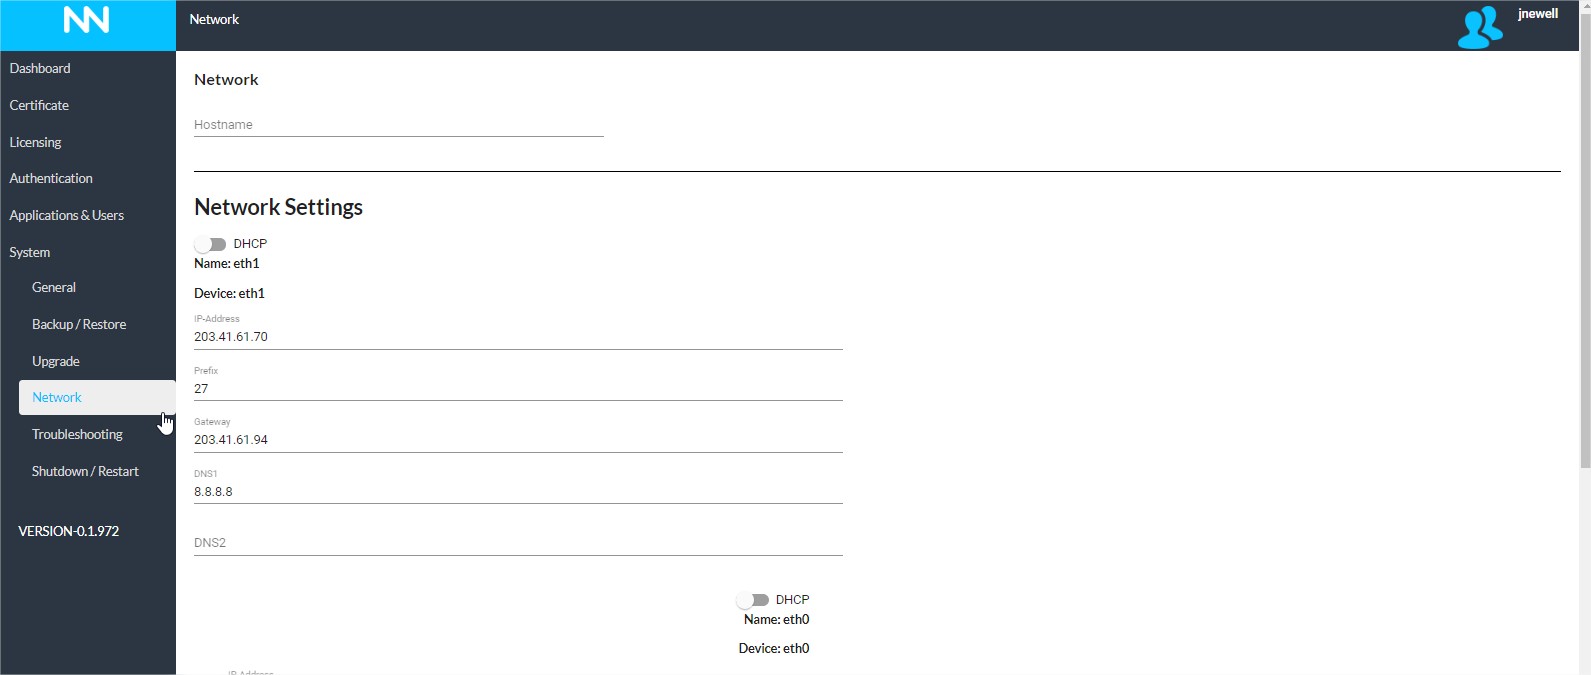
The System Network page, is used to configure the general network information, including setting the Host name of the box, the Primary and Secondary DNS, the Default Gateway and the Ethernet interfaces.
Hostname
The host name must match the common name on the digital certificate installed on the product. Whenever you change the host name, ensure you also have a matching digital certificate to install. If the digital certificate and the hostname of the product do not match, the end-user receives an error. The host name should also be in the global DNS and resolve to an IP address on the firewall.
Network Settings
The network settings section contains the details for each configured network adaptor on your NetConnect server. The following can be configured for each interface
- The IP address. Address configured on the interface; this can be internal/private or external/public providing you network is configured accordingly
- Prefix. The shorthand subnet mask.
- Default Gateway. This is usually the address of the router that is used to reach the Internet.
- DNS 1. IP address of your primary DNS server.
- DNS 2. IP address of your secondaryDNS server (optional).
DHCP toggle
Alternatively, your network adapter can be set to DHCP by switching on the DHCP toggle at the top of the Network Settings section.
DNS Suffix
If you are using NetConnect to connect to any domain resources via hostname, it is recommended that the domain is added to the DNS Suffix list; this will simplify configuration and end user access. By defining a global list of possible suffixes, attempts are made to resolve unqualified queries using each entry in the search list in turn until a match is found.
Add DNS Suffix
To add a DNS Suffix, simply click the ‘+’ to the left of the DNS Suffix text. Once clicked, you’ll be presented with text box where you can add your suffix
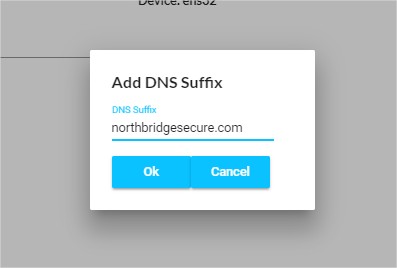
The entry will now appear within the DNS Suffixes list. Note, individual entries can be deleted by clicking delete icon to the right of your entry.