This page is applicable to NetConnect X 1.5 and above
Overview
In order to assign and manage access to your NetConnect environment efficiently, you can can create authentication stages linked to Active Directory, RADIUS servers and more. Details on how to configure specific stages are covered in this section
What is an Authentication Stage?
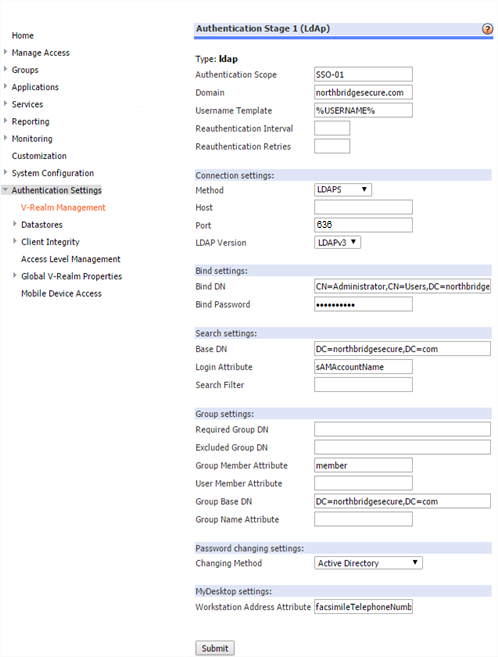
Authentication stages are essentially a link to an application, server or server role that validates a user’s login credentials. When we create an authentication stage, we simply provide the relevant information to allow NetConnect to verify the credentials a user provides. In most cases, you will configure an authentication stage using details of your Active Directory, however option options are available.
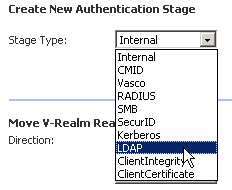
Below is a list of the authentication stages that can exist within a V-Realm.
| Authentication Stage | Description |
| Active Directory | Authenticates the user against the user account maintained on an Active Directory server. Note, other LDAP servers can be used in place of Active Directory. |
| Azure Active Directory | Authenticates the user against user accounts maintained within Azure Active Directory. |
| LDAPS | Authenticates the user against the user account maintained on an Active Directory server. In addition, traffic between NetConnect and your Active Directory/LDAP server is encrypted. |
| RADIUS | Authenticates the user against the user account maintained on the external RADIUS server. Typically used to support 3rd party MFA products, including Google Authenticator and Azure MFA. |
For details on configuring each of the above authentication stages, refer to the corresponding pages:
Creating an Active Directory Authentication Stage
Creating an Azure AD Authentication Stage
Creating a LDAPS Authentication stage
Creating a RADIUS Authentication Stage.
The Local Authentication Stage
The local authentication stage is a default stage available to all NetConnect instances. This stage provides administrators with an option to create and manage an internal store of users in the event that a connection to an external authentication store is not required. Keep in mind, single sign on to applications will not be possible for local users unless usernames and passwords are identical to the destination application. Local users can be added to this authentication stage and maintained via the Local User Management page.
Local User Management
The local user management page can also be accessed by clicking the ‘users’ icon on the Local stage row.
Keep in mind, the local authentication stage cannot be edited or deleted.
Managing Stages
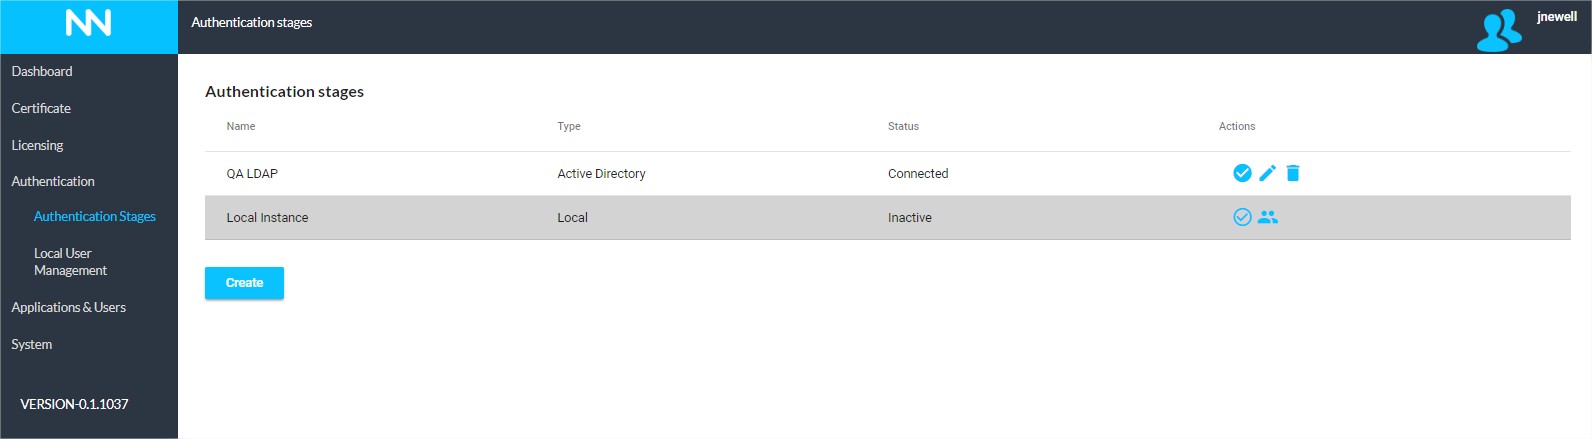
Once your stage(s) are created, they can be managed and maintained using the Authentication Stages table.
Activating an Authentication Stage
Once a stage has been created, it will appear within the Authentication Stage table however it will not be active by default, therefore user accounts within this stage will not yet be able to access your NetConnect instance.
Set stage as 'Active'
To activate a stage, click the ‘Set stage as Active’ icon within the appropriate row. You will receive an on screen notification confirm the stage has been successfully activated. If you wish to use this stage in conjunction with another stage(s), you can also set the order in which the stages will be presented to your users.
Set stage as 'Inactive'
Once a stage is active, the ‘Set stage as Active’ icon will replaced by the ‘Set stage as Inactive’ icon to reflect it’s new status. To take a stage out of service, click this icon; again, you will receive an on screen notification to confirm the operation has been successful.
Note, at least one Authentication Stage must be active at any one time. If you wish to set the only active authentication stage as inactive, you must first activate another stage.
Edit an Authentication Stage
Edit Authentication Stage
An active or inactive stage can be edited at any time. To do so, click the ‘edit’ icon within the authentication stage row. Once selected, you will be presented with the same view as you had when creating the stage; all fields can be changed as required.
Once your changes are made, you can ‘Test Connection’ to confirm the authentication endpoint can be reached and click ‘Update’ to save your changes. If you wish to discard the updates, click ‘Cancel’
Note, the default Local authentication stage cannot be edited.
Delete an Authentication Stage
Delete Authentication Stage
To remove an Authentication Stage, simply click the ‘Delete Stage’ icon on the appropriate line. You will receive an on screen notification to confirm the stage has been deleted.
Note, the default local authentication stage cannot be deleted.
Multi-Factor Authentication
For added security, you can activate multiple authentication stages at the same time to provided multi-factor authentication to your NetConnect instance. When a user logs in to an instance that has been set up with multiple authentication stages, successful authentication must occur at every stage before access to the workspace is allowed. To configure multiple authentication stages, simply active more than one authentication stage.
Change the order of the Authentication Stages
Reorder Active Stages
When multiple authentication stages are active, the table view updates to show the order the stages are presented to the users. This can be changed using the up and down arrows which appear within the stage rows.
Next Steps…
Once your Authentication Stage(s) has been configured, tested and activated you can move to create and assign applications. Alternatively, you may wish to create some local users if you’re not yet ready to link your instance to an external authentication store.
<< Configuration Main Menu Creating an Active Directory Auth. Stage >>